As an Amazon Associate, we earn from qualifying purchases. Some links on this site are affiliate links at no extra cost to you. Our recommendations are based on thorough research and editorial judgment.

What Are The Best RC Car Painting Techniques?
When painting RC cars, we should start with surface preparation, cleaning with warm soapy water and lightly sanding with 600-800 grit paper for better paint adhesion. We need to choose the right paint; polycarbonate paint works best for flexible bodies. Applying multiple thin coats, spaced 30-60 minutes apart, guarantees an even finish. Finally, adding details and a clear coat protects our hard work. There’s so much more to explore about techniques and tools to elevate our skills!
Key Takeaways
- Clean surfaces with warm, soapy water and soft sponges before painting to ensure proper adhesion.
- Sand the Lexan surface lightly with 600 to 800 grit sandpaper while keeping it wet to minimize dust.
- Apply multiple thin coats of paint, allowing 30 to 60 minutes drying time between layers for an even finish.
- Use specialized polycarbonate paint for flexible bodies and consider acrylic or enamel for hard plastics.
- Finish with clear coat layers, allowing 30-60 minutes drying time between applications for added protection.
Surface Preparation for Optimal Painting
When it comes to achieving a stunning finish on our RC car, surface preparation is the critical first step that can’t be overlooked. We start by using effective cleaning methods. Warm water mixed with mild dish soap works great to remove oils and manufacturing residues. Soft sponges help us avoid scratching the surface, and we must rinse thoroughly to keep detergent residues at bay. Next up, we turn to sanding techniques. Lightly roughening the Lexan surface with 600 to 800 grit sandpaper improves paint adhesion. Remember to keep the surface wet while sanding to minimize dust. After sanding, we should repeat our cleaning to remove any dust particles, ensuring the surface is pristine for painting. This groundwork is essential for our desired style! Additionally, ensuring that the paint application is done in low-traction environments can significantly enhance the overall finish and durability.
Selecting the Right Type of Paint

Selecting the right type of paint for our RC cars is essential, especially since there are several options out there—each with its strengths and weaknesses. For flexible polycarbonate bodies, we should use polycarbonate (Lexan) paint, which flexes without cracking. Acrylic paints, especially beginner-friendly options, are great for hard plastics, while enamel paints offer durability despite slower drying times. Lacquer paints provide a quick-drying, tough finish but need careful handling due to their odors. We can explore specialty paints like Spaz Stix Color Change for unique effects. Depending on our application format, we may choose spray cans for ease, airbrush-ready paints for precision, or dropper bottles for custom blends. Understanding paint properties will guide our painting journey! Additionally, ensuring a durable build will contribute to the longevity of our paint job.
Recommended Products

53 Gallon drum of NOVUS #2 Fine Scratch Remover
High Brightness Like Sunlight-The 0-900W LED hight mast stadium light provides 0-108000lm of 5000K natural white light, surpassing the brightness of traditional stadium lights. You can see everything at night with industrial intensity brightness, which is more than what you need at home. Don't try to use this stadium light in your backyard

Extremely low volume resistivity of 7. 6X10⁻⁵ Ω·cm
Essential Painting Techniques

After we’ve chosen the right paint for our RC cars, we can move on to the actual painting process. First, we need to prepare the surface by cleaning it thoroughly with soapy water. Let’s degrease it using plastic-safe products, and lightly sand it for better adhesion. When applying paint, remember our color theory: use darker shades first! For paint application, we’re aiming for multiple thin coats, allowing each one to dry for 30 to 60 minutes. We should always use high-quality masking tape for clean edges, and spray from 25–30 cm away for an even finish. Finally, let’s let the paint cure fully for 12 to 24 hours before touching it. Safety first, everyone! Additionally, consider using high-speed RC cars as a reference for the type of designs and aesthetics that appeal to enthusiasts.
Recommended Products

Precision-Tuned Ride: Each shock is vehicle-specific and tuned for your setup, featuring an 18mm chrome-hardened piston rod and heat-treated alloy bearings for unmatched control, smooth handling on and off-road.

Complimentary Initial Service: First-time service included

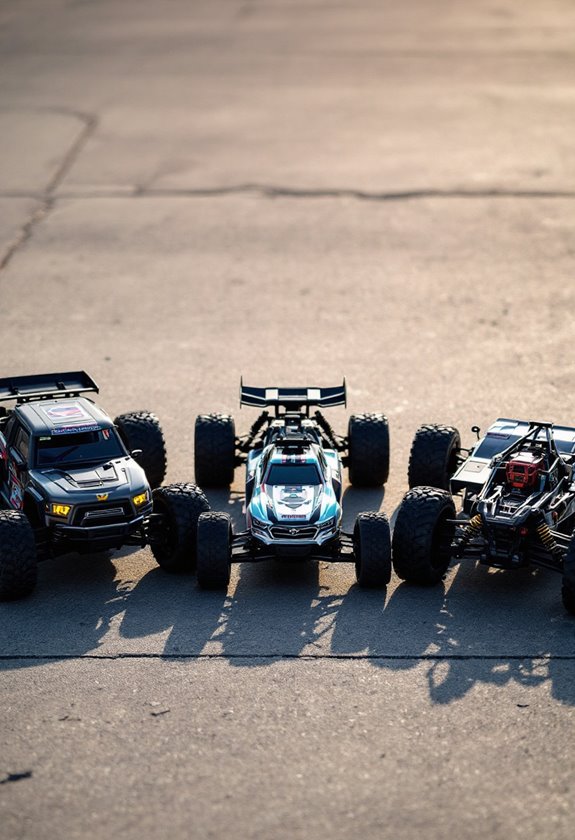
Toyota licensed 1/10 LC80: Fms 1/10 Land Cruiser 80 model, on the basis of PC blister soft shell using two-color spraying, in the sun to achieve “bling bling” effect. It also equipped with high simulation figures, exquisite dashboard and cockpit interior, faithfully restoring the original off-road performance.
Customization and Detailing Options

Customizing RC cars opens up a world of creativity and personalization that can take our vehicles from standard to striking. We can enhance our builds with custom decals, imbuing them with individuality and flair. Layering decals alongside airbrushing not only brings unique textures but also adds realism, mimicking features like headlights and sponsor logos.
LED integration is another exciting option, letting us illuminate our cars with functional and decorative lighting. Imagine the thrill of driving with bright underglow or working headlights at night! Additionally, custom molding and scale detailing, such as adding miniature antennas and driver figures, really brings our designs to life. With these customizations, our RC cars become not just models, but personal statements of our style and creativity. Moreover, considering the durability of material is crucial when selecting parts for customization to ensure longevity and resistance to impacts.
Recommended Products

Fitment:This set of side skirts extension flat is well fit for Lexus RC F Coupe 2Door 2015 2016 2017 2018
MAXIMUM OFF-ROAD MUD PROTECTION: Keep heavy mud, flying rocks, and trail debris completely out of your cab. This premium combo kit provides an aggressive stance and massive coverage: the front arches deliver up to 7.5 inches of protection, while the unique, non-tapered rear flares add up to 8 inches of coverage over your rear tires.

Requires 10124 and 10125 body mounts.
Finishing Touches and Sealing Techniques

When it comes to finishing touches on our RC cars, applying clear coats and sealing paints is crucial for protecting our hard work. We should aim for multiple thin layers of clear coat application, allowing 30-60 minutes of drying time between each layer. This prevents runs and gives us a smooth finish. Choosing between glossy and matte clear coats can give our cars a unique look. Glossy finishes are shiny and reflective, while matte finishes provide a subtle appearance and help hide minor paint chips. Effective masking techniques are essential to protect different finishes on our projects, especially around windows. Using quality masking tape guarantees crisp lines and enhances our overall finish, creating a professional look we can all be proud of. Additionally, maintaining lubrication levels in our RC vehicles can help ensure that the components function properly and extend their lifespan.
Recommended Products


Features a unique 0.5 mm needle and nozzle combination for high-performance, general-purpose, high-paint flow spraying
Tools Required for Successful Painting
To achieve a successful paint job on our RC cars, we need the right tools. Essential paints include spray paints designed for Lexan, like Tamiya and Testors. For detailed work, airbrushes (such as Iwata or Badger) allow for precision, while aerosol spray paints provide quick coverage.
We can’t forget our masking techniques; high-quality masking tape is crucial for clean edges, and masking fluid is perfect for intricate areas. Surface preparation is important too, so let’s keep isopropyl alcohol wipes handy for cleaning. Additionally, using high-quality materials ensures that our paint withstands various terrains, similar to how electric monster trucks perform better with durable construction.
Effective paint storage maintains our colors stay fresh, and painting stands or clips can help support our bodies during the process. With these tools, we’re set to create some amazing designs together!
Safety Precautions While Painting
Safety is paramount when we’re diving into the exciting world of painting our RC cars, especially since the paints we use contain solvents that can be harmful. First, let’s gear up with proper safety gear. We should all wear a high-quality respirator designed for spray painting to avoid those toxic fumes. It’s essential to work in well-ventilated spaces, ideally outdoors or anywhere with good air circulation. Remember to don gloves and protective eyewear to guard against overspray and skin irritation. Always keep our paints stored in sealed containers when not in use. And don’t forget to clean our equipment after each session and follow local guidelines for disposing of waste. By prioritizing safety, we make our painting experience enjoyable and secure.
Frequently Asked Questions
Can I Use Regular Spray Paint on RC Car Bodies?
While regular spray paint may seem tempting, we shouldn’t risk our RC car bodies. Spray paint types vary, and without proper prep for paint adhesion, we might end up with peeling and cracking. Let’s choose wisely!
How Do I Fix Runs or Drips After Painting?
To fix runs or drips, we can gently sand these imperfections and apply touch-up techniques using thin layers. This guarantees our paintwork remains smooth and flawless, creating a finish we can all be proud of.
Is It Necessary to Sand Between Paint Coats?
Yes, it’s necessary to sand between paint coats. Sanding benefits paint adhesion, helping layers stick better and enhancing our finish. By taking this step, we’re ensuring a durable, professional look for our RC projects.
What Is the Best Temperature for Painting RC Cars?
We believe the best temperature for painting RC cars ranges from 65-75°F; anything lower can create chaos! Pair this with ideal humidity, and we’ll guarantee vibrant, beautiful finishes that we can all admire together!
How Long Should I Wait Before Applying a Clear Coat?
We should wait at least 12 to 24 hours for proper paint curing before applying a clear coat. If we rush the drying times, it could lead to defects that ruin our hard work.