As an Amazon Associate, we earn from qualifying purchases. Some links on this site are affiliate links at no extra cost to you. Our recommendations are based on thorough research and editorial judgment.

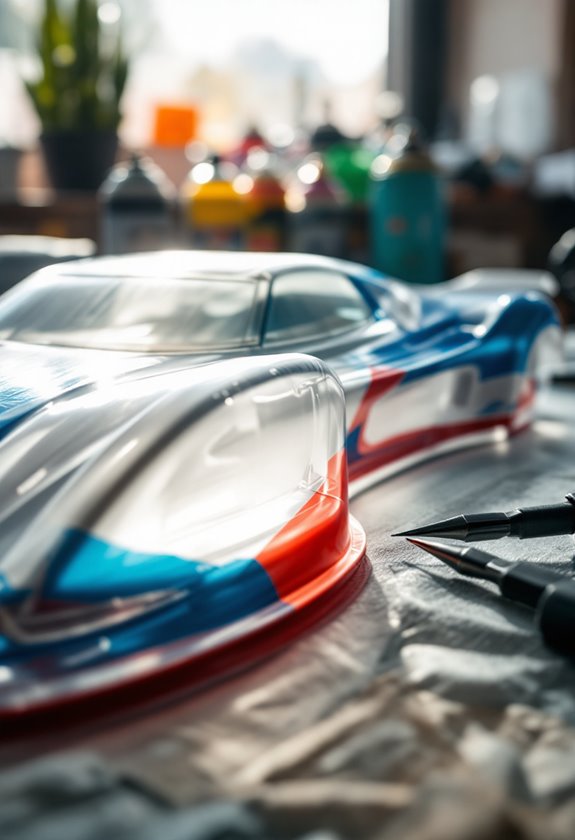
How To Paint An RC On Road Car Body?
To paint an RC on-road car body, we start by choosing the right materials, like polycarbonate paints such as TAMIYA’s PS spray. We prepare the body by cleaning it and marking cut lines with a fine-tip marker. Next, we carefully cut the body using Lexan scissors and apply thin coats of primer, letting each dry for 30 minutes. Finally, we add decals and a clear coat for protection. Stick around for detailed pointers to guarantee a fantastic finish!
Key Takeaways
- Choose durable, impact-resistant polycarbonate paints for best results and ensure surface preparation with primer for optimal adhesion.
- Clean the RC car body thoroughly, using a mild soap solution and ensuring it’s dry before applying any paint.
- Use high-quality masking tape to mark cut lines accurately, preventing overspray and creating clean edges for your design.
- Apply multiple thin coats of paint, allowing adequate drying time between layers to ensure a long-lasting finish.
- Finish with precise decal application and maintain the painted body by cleaning with mild soap and storing it properly.
Choosing the Right Materials
When we paint an RC car body, choosing the right materials is essential to achieving a stunning, durable finish. First, consider polycarbonate paints like TAMIYA’s PS spray; they adhere beautifully, resist cracking, and handle impacts well. Next, water-based acrylics, such as Pro-Line’s RC Body Paint, are perfect for those wanting easy cleanup and low toxicity, offering options in metallic, matte, and solid colors.
Don’t forget about hard plastic bodies; they need special attention too! Remember to test paint on small sections for durability. With regard to color selection, these paints come in a broad palette, so we can really let our creativity shine. Pay attention to finish types, like matte or glossy, to elevate our designs even further! Additionally, using durable build features will help ensure that the painted body withstands the rigors of off-road adventures.
Recommended Products

Durable 0.7mm Thick Polycarbonate Body

【Officially Licensed Ford Bronco Baja 1000 Design】Fully licensed by Ford and RTR Vehicles, featuring two iconic Baja 1000 liveries from 2024 and 2025—perfect for collectors and hardcore off-road fans.

Pre-mounted drift and grip tires Included
Preparing the Car Body

Preparing your RC car body is an important step, and there are several key areas we need to focus on to guarantee a flawless finish. First, let’s use effective masking techniques. We should mask all areas not intended for paint with high-quality modeling tape. This helps us avoid overspray and guarantees clean edges. Next, we’ll want to check environmental conditions; keeping everything at room temperature and painting in a dust-free area is essential. It’s also crucial to inspect the body for imperfections, filling minor scratches where necessary. Finally, applying a thin, even coat of primer can enhance paint adhesion, helping the finish stay smooth and even. Remember, attention to these details makes all the difference! Additionally, using high-quality materials like ABS plastic can improve durability and impact resistance of the car body.
Cleaning the Surface

Cleaning the surface of your RC car body is essential, as it sets the foundation for a successful paint job. We should begin with dry cleaning methods: using a soft brush or microfiber cloth, we remove loose dirt. Next, a blast of compressed air can clear tight spots. For stubborn grime, gentle circular scrubbing with a soft brush works best. When washing, a mild soap solution or automotive-grade cleaner is key—just avoid harsh chemicals! Remember to dry thoroughly to prevent water spots, using microfiber cloths or air blowers. After cleanup, we can also consider applying a light oil on exposed metal parts for surface protection. Regular maintenance keeps our car looking sharp and ready to impress! Additionally, regular inspections help identify any wear or damage that could affect the paint finish.
Marking Cut Lines

After giving our RC car body a thorough cleaning, we’re ready to tackle the next step—marking cut lines. First, we recommend using fine-tip permanent markers, like Sharpies, for clear, durable lines. To protect adjacent areas, applying masking tape or liquid mask along desired edges is vital. Using consistent marking techniques, we can trace key areas such as wheel wells and windows accurately.
For better line visibility, we should use contrasting colors if painting is planned. Additionally, lighting plays an important role; bright conditions help us see our lines clearly. Remember to lightly score cut lines with a hobby knife and always mark on the outside of the body shell. This guarantees that our final cuts are precise and maintain the intended dimensions. Upgrading your RC buggy with high-capacity batteries can also enhance your overall experience while painting, ensuring that the car performs optimally once the body is complete.
Cutting the Body
Cutting the body of your RC car is an essential step that requires precision and the right tools. For an accurate cut, we need effective tool selection. Let’s use curved Lexan scissors designed for polycarbonate—perfect for those tricky wheel wells. Start by lightly scoring the marked lines with a sharp hobby knife. This makes peeling away excess material easier. When using cutting techniques, remember to follow the contours carefully to avoid mistakes. Tap the scored edges gently to break away the plastic without cracking. We recommend avoiding high-speed rotary tools for cutting; they can melt the Lexan. Instead, save them for low-speed smoothing after all cuts are made. Keeping blades sharp guarantees clean, controlled edges and a professional finish. Additionally, ensuring a proper tire compatibility can enhance the overall performance of your RC car once the body is painted.
Sanding Edges for Smoothness
To achieve a smooth, professional finish on our RC car body, sanding the edges is an essential step we shouldn’t overlook. We start with coarse grit sandpaper (200-400) to eliminate rough edges and excess material. Next, we shift to medium grit (600-800) for refining, followed by fine grit (1000-1200) to achieve that polished look. Using proper sanding techniques, like wrapping sandpaper around a flat block for even pressure, is vital. We can also utilize sanding sticks for those tight curves. Wet sanding with fine grit enhances smoothness and reduces dust. Let’s remember to clean our edges after sanding, ensuring they’re free from debris for the best paint adhesion. With careful edge preparation, our paint finish will shine! Additionally, maintaining battery connections is crucial for overall performance and longevity of your RC vehicle.
Selecting Polycarbonate Paints
Selecting the right polycarbonate paint for your RC car body can be a game changer for both appearance and durability. Let’s consider the essential paint characteristics. We need a flexible paint that can withstand the body’s natural flexing without cracking or flaking. When comparing brands, Pro-Line’s water-based formula shines for being ultra-flexible and ready-to-spray. Tamiya offers lacquer-based options, great for their imperviousness to oils. For a unique finish, Candy2o paints can add a stunning candy effect, but require a metallic base. Remember, selecting the right reducer can enhance our painting experience, ensuring smooth airflow through airbrushes. By choosing wisely, we’ll elevate our RC cars’ look, making them both vibrant and resilient on the track!
Recommended Products

HRP Hpi Racing Wr8 2001 Wrc Subaru Impreza Painted Body 300Mm

ARRMA 1/7 Painted Body, Orange: FELONY 6S BLX, ARA410009

ARRMA 1/7 Painted Body, Black: FELONY 6S BLX, ARA410007
Painting Techniques
Once we’ve picked the right paint for our RC car body, understanding painting techniques plays an essential role in achieving that flawless finish. To start, we should maintain a steady distance of 25 to 30 cm from the body while spraying. This helps create even spray patterns. It’s important to apply several thin coats with 30 to 60 minutes of drying time in between, which prevents unsightly bubbles. Let’s also remember to spray in consistent directions for a uniform look. For color blending, using precise masking and layering techniques can add depth. Finally, we should always test our spray paint on cardboard first to perfect our approach before going for the real deal on our prized RC car!
Recommended Products

Ready to Spray. Use right out of the bottle (with a 0.5mm tip @ 30psi)

【RapidAir Fast Spray & Dry】Equipped with Kaleido’s proprietary RapidAir technology, Clear Colors deliver a buttery-smooth spray experience comparable to lacquer paints. Fast application without beading, sagging, or edge build-up. Air-dry to the touch in just 15 - 20 minutes, perfect for streamlining your workflow.

No priming or sealing necessary
Applying Primer for Better Adhesion
Applying primer on our RC car body is a crucial step in ensuring a long-lasting finish. The primer benefits us by creating a base layer that enhances paint adhesion, filling small scratches and imperfections. For maximum adhesion techniques, we should start by cleaning the body with detergent and lightly sanding it with 600-800 grit sandpaper. This prepares the surface and promotes better bonding. Next, we apply thin, even coats of primer, keeping a distance of 25-30 cm to avoid drips. It’s essential to let each layer dry for 30 minutes to an hour. By using primer, we’re not just protecting our paint job from flaking, but also ensuring a durable bond that stands up to the challenges of racing.
Recommended Products

Features a unique 0.5 mm needle and nozzle combination for high-performance, general-purpose, high-paint flow spraying
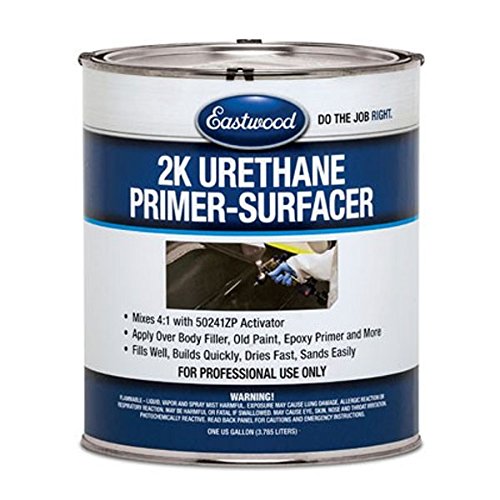
HIGH-BUILD URETHANE PRIMER: Eastwood 2K Urethane Primer is a multipurpose surfacer that can be used on bare metal, body filler, epoxy primer, and even existing paint. It's an excellent choice if you want to achieve a perfectly smooth surface on an older paint job, as the primer is sandable and fills imperfections as you spray. However, please note that the Eastwood 2K 4:1 Urethane Activator (50241ZP) is required to use this primer paint, and it is sold separately.

✔ PROFESSIONAL HIGH BUILD PRIMER – Enhances topcoat application by filling minor imperfections and ensuring a smooth, durable finish.
Masking for Multi-Color Designs
With our primer layer set and dried, we can now focus on masking for those exciting multi-color designs. To achieve clean lines, we recommend using 3M Safe Release™ painters tape. This guarantees easy removal without sticky residue. Liquid mask is great for protecting complex patterns, while pre-cut decal masks offer professional-quality edges, preventing paint bleed-through.
When applying masks, let’s tackle color blocks section by section, starting with the largest areas. We should press tape edges down with something like a pencil eraser to guarantee sharp lines. Remember to remove the protective cover of the masks after the base coat dries. By employing these masking techniques strategically, we can create stunning paint layering that will wow everyone!
Recommended Products

STRONG AND RELIABLE: Resists breaking, lifting and edge curl with premium paper backing


Superior Adhesion: Proprietary rubber-based adhesive ensures the tape sticks firmly to various surfaces, minimizing lifting or edge curl during painting.
Drying Times Between Coats
When we paint an RC car body, understanding drying times between coats is vital for achieving that perfect finish. Typical drying times range from 15 minutes to an hour, depending on environmental factors such as humidity and temperature. Using effective drying techniques, like gentle heat from a hairdryer, can speed up drying, but this doesn’t replace curing time. We should allow about 1 to 2 hours between coats for proper adhesion. It’s imperative to apply thin layers; 3 to 4 coats are ideal, as rushing can result in poor bonding. Remember, low humidity and moderate heat create the best conditions for optimal curing. Always keep an eye on drying progress to guarantee a long-lasting finish!
Adding Decals and Stickers
To successfully add decals and stickers to our RC car body, we need to start by guaranteeing the surface is impeccably clean. A mild soap and water solution or isopropyl alcohol will work great for this. Once it’s dry, we can move on to decal placement.
Before sticking anything down, let’s lay out our decals to visualize their placement. When we’re ready, attach one end of a decal and gently press it down while managing air bubbles—smoothing out wrinkles is key! For complex curves, a burnishing tool can help guarantee they’re properly stuck. If we encounter stubborn bubbles, we can use a hobby knife to pierce them. With care and patience, our decals will look fantastic!
Sealing With a Clear Coat
After we’ve carefully painted our RC car body and allowed it ample time to dry, sealing it with a clear coat becomes crucial for achieving that professional finish we all want. The clear coat benefits are significant—it adds extra shine and protects our paint from scratches, UV damage, and wear. However, application challenges can arise. We’ve got to guarantee the surface is dust-free, mask off unwanted areas, and test the spray pattern first. Remember to hold the can about 25-30 cm away. Applying thin layers allows us to avoid runs, and it’s often best to do 2-4 light coats. With practice, we can master the technique and enjoy the polished look that comes with a well-applied clear coat!
Proper Maintenance of Painted Bodies
Once we’ve perfected our clear coat application, proper maintenance of our painted RC car bodies guarantees that the hard work we put into painting lasts. To keep our painted surfaces looking fresh, we should adopt a solid maintenance routine. First, we can wash our cars using mild soap and warm water, avoiding harsh chemicals that can harm our paint protection. After the wash, we need to dry them with a microfiber cloth to prevent spots.
Additionally, handling our cars carefully is key; let’s not grip near painted areas. Lastly, conducting touch-ups with compatible paint will help us keep our car bodies in top shape. Regular inspection for chips or cracks can save us from larger issues down the road.
Storing Painted Car Bodies Safely
Storing painted RC car bodies safely is essential to keeping them in great condition, and there are several effective practices we should follow. First, let’s focus on the right storage conditions: a dry, well-ventilated area without humidity is key. We should avoid direct sunlight, maintaining a stable temperature between 50°F and 77°F. Next, using protective measures like padded plastic bins or breathable cloth bags will guarantee our painted bodies are cushioned. Individually storing each body prevents paint chipping from contact. We also want to periodically check for moisture or paint degradation. Finally, let’s keep our batteries securely stored away from our painted bodies to prevent damage while guaranteeing both our cars and batteries stay in top shape!
Frequently Asked Questions
Can I Use Regular Spray Paint on Polycarbonate Bodies?
We wouldn’t recommend using regular spray paint on polycarbonate bodies. It often struggles with paint adhesion and can crack or peel, leading to disappointing results. Let’s stick with polycarbonate-specific paints for the best outcomes!
How Do I Remove Paint From a Lexan Car Body?
Did you know that using specialized polycarbonate cleaners can improve paint removal efficiency by 70%? For effective paint removal techniques and lexan care, we recommend methods like brake fluid soaking combined with gentle scrubbing.
What Tools Do I Need for Decal Application?
For successful decal placement, we’ll need cleaning solutions, sharp cutting tools, and smoothing implements. With proper application techniques like using squeegees and heat, our decals will look professional and enhance our RC car’s appearance.
Is Airbrushing Better Than Spray Cans for Painting?
When we’re crafting our masterpiece, airbrush techniques offer a delicate touch, while spray can advantages provide speed. Together, we can choose the method that dances to our creative rhythm and enhances our shared passion for painting.
How Often Should I Repaint My RC Car Body?
We should consider repaint frequency based on our usage and paint durability. Casual users might repaint every 1-2 years, while competitive racers may need to repaint every couple of months to keep their cars looking fresh.


